Dorm room upgrades you can remove at move-out are useful when a plain room needs storage, light, privacy, or personality, but drilling, painting, permanent adhesive, and heavy hardware are not allowed. The best upgrades feel helpful every day and boring at checkout: they come down cleanly, leave the original surfaces alone, and do not create a repair conversation with housing staff later.
Start with the room rules, not the shopping list. Dorm walls, doors, desks, beds, closets, and windows may have specific restrictions from the school or property manager. Even if an item says removable, it still needs to match the surface, weight, heat, moisture, and removal instructions for that exact spot.
Why This Matters
A dorm room works hard. It is a bedroom, study area, storage zone, snack station, closet, and sometimes a shared living space. Because the room has to do so many jobs, students often add hooks, lights, bins, curtains, risers, mirrors, posters, and shelves quickly. The problem is that quick upgrades can become move-out problems if they rely on weak paint, overloaded adhesive, blocked exits, or unclear housing rules.
For adhesive products, weight limits are not all the same. Command's official Product Weight Limits Guide shows different capacities across product types, which is a reminder to match the hook, strip, or hanger to the real loaded weight, not just the empty item.
That weight check is only one part of the decision. Housing rules still matter, especially in dorms where paint, doors, windows, sprinkler systems, electrical outlets, and fire-safety paths may be controlled by campus policy. If the rule is unclear, ask before installing anything that touches a wall, ceiling, window frame, door, or shared fixture.
Start With Renter-Friendly Room Refreshes
Renter-friendly room refreshes work best when they solve a daily friction point. A dorm room may feel unfinished because the lighting is harsh, the desk is crowded, the closet is small, the bed area has no privacy, or the walls look empty. Each problem has a different removable solution.
If the room feels cluttered
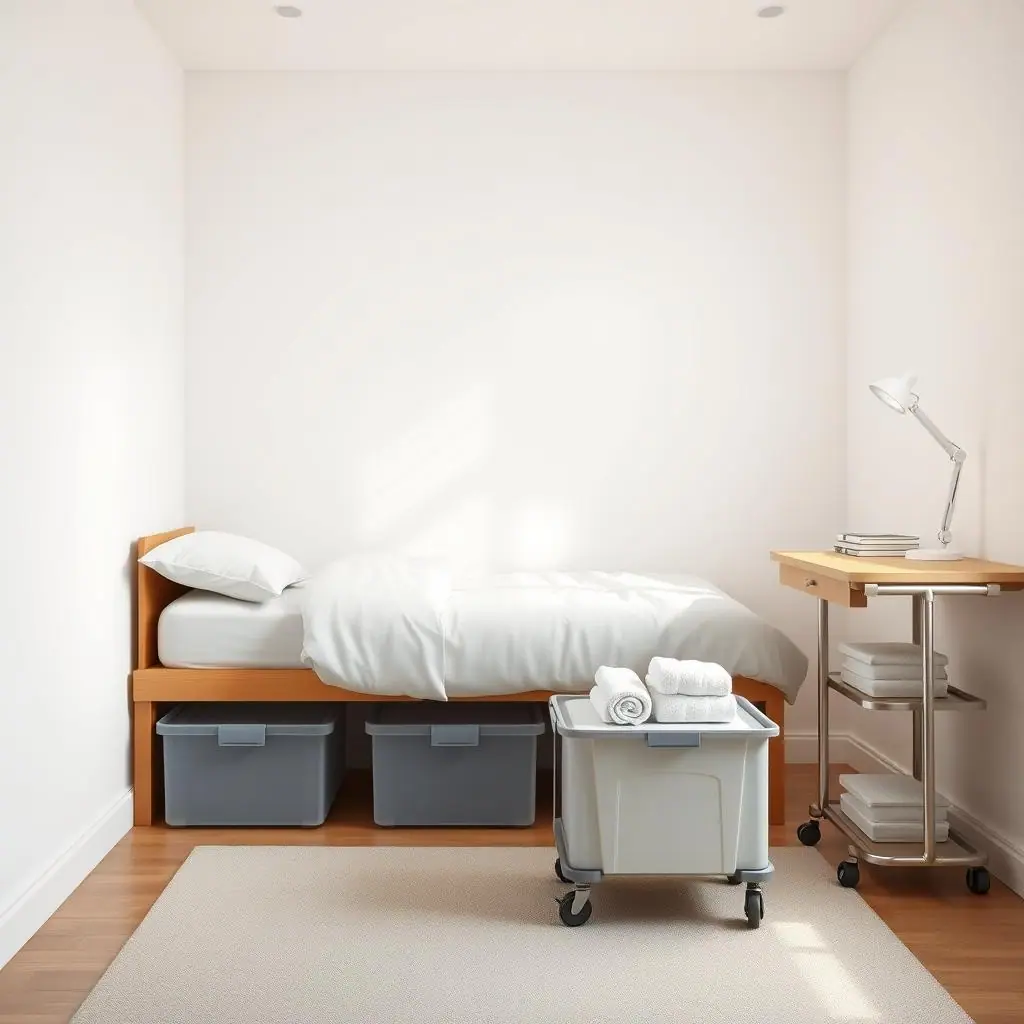
Begin with storage that does not depend on walls. Under-bed bins, a rolling cart, drawer dividers, stackable cubes, a shoe rack, or a slim laundry hamper can improve the room without touching paint. These pieces are also easy to remove during inspections, cleaning, and move-out.
If the room feels impersonal
Use lightweight decor in a few focused zones instead of covering every wall. A fabric pin board that stands on a desk, a removable photo rail rated for the surface, framed art on a shelf, washable bedding, and a small rug can make the room feel more personal while keeping the walls easier to reset.
What to Check First for Dorm Room Upgrades You Can Remove at Move-Out
Before buying anything, check four things: the housing agreement, the product instructions, the surface condition, and the removal plan. If one of those is uncertain, choose a lower-risk option.
General tenant resources such as USA.gov tenant rights guidance can point readers toward housing help, but dorm rules are usually more specific than general renter advice. Your resident handbook, housing portal, move-in packet, and written instructions from residence life are the sources that decide what is allowed in your room.
Check the surface before attaching anything
Dorm walls can be painted cinder block, drywall, paneling, tile, brick, laminate, or older painted surfaces. Some are smooth and stable; others are dusty, textured, damp, or already chipped. Adhesive products may fail on rough, dirty, cold, humid, or weak surfaces, and removal can lift paint if the surface is not sound.
Check the real loaded weight
A small hook may hold an empty tote but fail when the tote is filled with chargers, keys, toiletries, or snacks. Weigh the loaded item when possible, or choose a freestanding solution if the weight is uncertain. Never hang glass, heavy mirrors, plants in wet soil, shelves, cookware, or anything breakable above a bed or desk unless the product and housing rules clearly support it.
How to Handle Dorm Room Upgrades Step by Step
Use this sequence before installing anything removable.
Step 1: Map the room zones
Divide the room into sleep, study, clothes, snacks, door, and shared zones. Write down one problem in each zone. This prevents buying duplicate organizers and helps you avoid adding decor where storage is the real issue.
Step 2: Choose freestanding first
Pick upgrades that sit on the floor, desk, bed frame, or shelf before using adhesive. Under-bed storage, clip-on desk lamps, bedside caddies, over-the-door organizers allowed by the room rules, and rolling carts are easier to remove than wall-mounted pieces.
Step 3: Use adhesive only for light, approved items
If adhesive is allowed, use it for light decor, small hooks, cord guides, or low-risk items only after cleaning and drying the surface according to the product directions. Avoid ceiling use, damp zones, painted surfaces that already chip, and items that will be pulled daily with force.
Step 4: Keep fire and access paths clear
Do not cover smoke detectors, sprinklers, vents, heaters, outlets, door hardware, peepholes, emergency instructions, or window access. Do not run cords under rugs or across walkways. A dorm upgrade should never make the room harder to exit, inspect, clean, or share.
Step 5: Save packaging and take photos
Keep the product instructions, removal tabs, spare strips, and receipt in one bag. Photograph the room before installation, after installation, and during removal. This makes move-out easier and helps you remember what the room looked like originally.
Step 6: Schedule a removal test
Do not wait until the last night. A few weeks before move-out, remove one small low-risk item and check the surface. If residue, peeling paint, or stubborn adhesive appears, stop and follow the product directions carefully instead of rushing through the rest.
Common Renter-Friendly Room Refreshes Mistakes to Avoid
The biggest mistake is treating a dorm like a permanent apartment. Dorm rooms usually have stricter rules, faster inspections, shared maintenance standards, and less control over surfaces than a typical rental.
- Buying before checking rules: some dorms ban certain adhesives, extra lighting, door hangers, curtains, candles, extension cords, or lofting changes.
- Using one hook for too many jobs: a hook for a lanyard is not automatically safe for a backpack, robe, mirror, or loaded organizer.
- Covering too much wall space: large adhesive murals, dense photo walls, and heavy poster clusters can be harder to remove cleanly.
- Ignoring shared-room boundaries: removable does not mean roommate-friendly. Keep decor, lighting, storage, and cords inside your agreed area.
- Leaving removal to move-out day: rushing can tear tabs, pull paint, leave residue, or make small damage harder to document.
Pros and Cons
Makes a plain room work better
Freestanding storage, better lighting, soft decor, and simple desk organization can make a dorm more comfortable without changing the room permanently.
Move-out can stay simpler
When upgrades are documented, lightweight, and easy to remove, checkout is less stressful and surfaces are easier to inspect.
Works with small budgets
A few useful pieces, such as bins, clips, lamps, rugs, and desk organizers, can improve daily routines without a full room makeover.
Rules vary by building
An item that is fine in one dorm may be banned in another because of surfaces, fire rules, furniture policies, or inspection standards.
Some surfaces are unforgiving
Old paint, textured block, laminate, cold walls, and dusty surfaces can make adhesive products less reliable or harder to remove cleanly.
A Simple Checklist
Use this checklist before installing a dorm upgrade:
- Rules: does the housing agreement allow this product type in this location?
- Surface: is the wall, door, desk, or frame clean, dry, smooth, stable, and approved by the instructions?
- Weight: is the loaded item within the product rating with a margin for daily use?
- Safety: does the setup avoid outlets, vents, heaters, sprinklers, doors, windows, and walkways?
- Roommate impact: does it avoid glare, noise, blocked storage, or shared-space clutter?
- Removal: do you have the instructions, original packaging, and enough time to remove it carefully?
When to Get Extra Help
Ask residence life, housing staff, a resident assistant, or the property manager before installing anything large, adhesive-heavy, electrical, heat-producing, ceiling-mounted, window-mounted, or unclear under the rules. If the upgrade changes furniture height, blocks a safety path, touches building systems, or requires tools, do not guess.
Extra help is also useful when surfaces already look damaged. If paint is bubbling, drywall paper is torn, laminate is lifting, or a door has old residue, take photos before adding anything. You do not want a removable product blamed for damage that was already there.
Frequently Asked Questions
What should I check first for dorm room upgrades?
Check the housing rules, the exact surface, product instructions, loaded weight, and move-out removal steps. If any part is unclear, start with freestanding storage or decor.
How often should I review removable dorm upgrades?
Check them after the first week, then about once a month. Look for peeling edges, loose hooks, cord clutter, blocked vents, rubbing doors, or items getting heavier over time.
What should I do if I am not sure a product is allowed?
Do not install it yet. Read the dorm handbook, check the housing portal, ask residence life, and keep written guidance when possible. A smaller freestanding option is often safer.
Can I undo these dorm room changes later?
Many changes can be removed, but clean removal depends on the product, surface condition, time installed, room climate, and following directions slowly. Plan removal before move-out week.
Final Thoughts
Dorm room upgrades you can remove at move-out should make the room easier to live in without turning checkout into a repair project. Start with freestanding storage, clip-on lighting, soft decor, and lightweight approved wall items. Save heavier, adhesive-heavy, or rule-sensitive ideas for places where you have clear permission.
The strongest dorm setup is practical, documented, and easy to reverse. Solve one daily problem first, keep the original room in mind, and give yourself enough time to remove everything calmly before move-out.