No-drill kitchen storage ideas for small apartments work best when they solve one daily friction point without pretending every wall, cabinet, or lease can handle the same product. A tiny kitchen usually needs better placement more than it needs more things attached to it.
Before buying hooks, racks, caddies, or organizers, look at what actually piles up. Mugs may need a closer home. Cleaning supplies may need a bin that slides out. Spices may need a shallow drawer insert instead of another wall rack. The renter-safe goal is simple: add useful storage while keeping weight, moisture, heat, and removal risk under control.
Why This Matters
Small apartment kitchens often have awkward gaps, limited drawers, shallow cabinets, and very little counter space. That makes vertical storage tempting, but it also makes overloading adhesive products tempting. A hook that works well for a potholder may be a poor choice for a heavy pan, a glass jar, or anything that could fall onto a cooking surface.
The other reason to plan carefully is move-out. A storage fix that saves ten minutes every morning is not worth it if it peels paint, leaves residue on a cabinet door, or blocks a ventilation gap. The best no-drill choices are easy to use, easy to inspect, and easy to remove slowly later.
Start With the Storage Job, Not the Product
Most small kitchens need zones more than gadgets. Group the problem by task: morning coffee, cooking tools, lunch containers, cleaning supplies, pet items, or spices. Then choose the least permanent storage method that keeps those items close to where they are used.
Sort by daily reach
- Daily items: keep mugs, dish towels, cooking utensils, or coffee tools between waist and eye level when possible.
- Weekly items: store baking tools, extra containers, or backup supplies higher, lower, or farther from the main prep area.
- Heavy items: keep pans, appliances, glass jars, and bulk food on shelves, carts, or inside cabinets instead of adhesive hooks.
- Wet items: give sponges, brushes, and cloths airflow so they are not trapped against paint or unfinished cabinet surfaces.
This first pass keeps the project grounded. Instead of asking, "Where can I stick more storage?" ask, "What item keeps landing in the wrong place, and what is the lightest safe way to give it a home?"
What to Check Before Trying No-Drill Kitchen Storage Ideas for Small Apartments
Every no-drill kitchen storage idea has three limits: the surface, the load, and the environment. Smooth tile can behave very differently from painted drywall, unfinished wood, textured cabinet panels, or a wall near steam and cooking grease.
For adhesive hooks and caddies, Command's official hook guidance tells users to check weight limits, clean the wall with rubbing alcohol instead of household cleaners or water, wait after painting, and avoid wallpaper or soft surfaces. You can review the manufacturer's current instructions on the Command indoor and outdoor hooks guide.
That source is useful because it shows why product instructions matter more than general internet advice. A different brand may have a different surface list, cure time, removal method, or weight rating, so the package and manufacturer page should be treated as the rule for that specific product.
Check the rental side too
If your lease is strict about adhesive products, cabinet contact paper, or wall-mounted storage, verify that before installing anything visible. For broad housing and tenant-resource direction in the United States, USA.gov's housing help page can point readers toward rental and local housing resources. Your lease and local rules still decide what applies to your apartment.
How to Add Kitchen Storage Without Drilling
Start with storage that does not touch the wall at all. Freestanding and tension-based choices are usually easier to undo than adhesive products, especially in kitchens where heat, steam, and grease can weaken the bond over time.
Step 1: Use cabinet interiors first
Inside cabinet doors can hold very light items when the product is designed for that surface and the door still closes cleanly. Think measuring spoons, a small cleaning chart, lightweight lids, or a narrow plastic wrap holder. Avoid adding anything that makes the hinges strain or causes the door to swing open.
Step 2: Try shelf risers and drawer inserts
Shelf risers, lazy Susans, drawer dividers, and shallow bins create more usable layers without adhesive. They are especially helpful for mugs, spices, snacks, towels, food containers, and small packets that disappear at the back of a cabinet.
Step 3: Add over-the-door or over-cabinet storage carefully
Over-cabinet hooks and baskets can work well for towels, foil boxes, cutting boards, or cleaning cloths, but check thickness and clearance before buying. The door should close without scraping the frame, bending the hook, or rubbing the finish every time it moves.
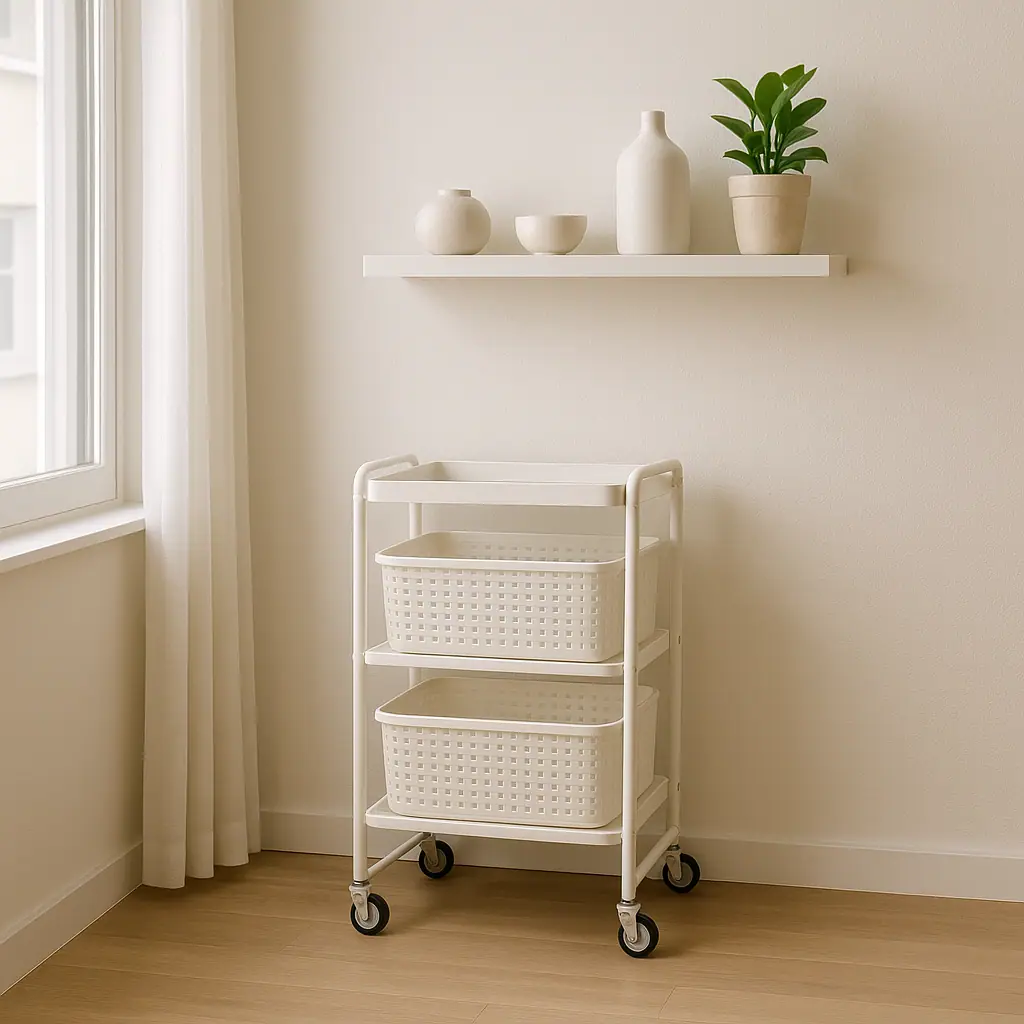
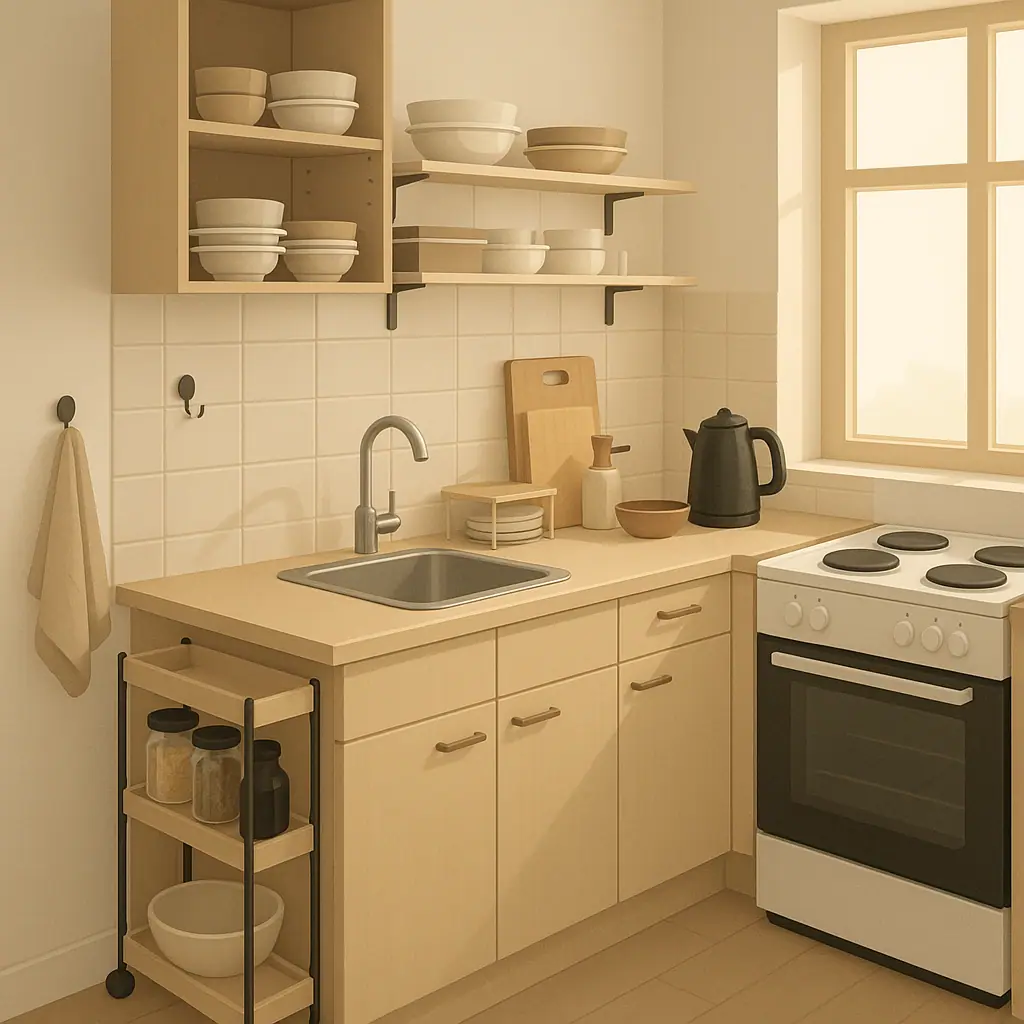
Step 4: Use a rolling cart for heavier overflow
A narrow rolling cart can hold pantry overflow, coffee supplies, lunch containers, or cleaning products without asking the wall to carry weight. Choose one that fits the walkway with room to open the oven, dishwasher, refrigerator, and cabinets.
Step 5: Save adhesive for light, low-risk items
Adhesive hooks are best for light tools that would not cause damage if they fell: measuring spoons, dish towels, a silicone trivet, or a small brush. Avoid valuable, breakable, heavy, sharp, or heat-sensitive items. In a kitchen, a failed hook can become more than an annoyance if it drops near a hot pan or wet floor.
Common Lightweight Kitchen Storage Mistakes to Avoid
The easiest mistake is filling every blank surface. Small kitchens feel calmer when the most-used items are visible and the rarely used items are hidden, not when every cabinet side becomes a display wall.
- Ignoring door movement: organizers that scrape, rattle, or block a cabinet will get annoying quickly.
- Trusting the maximum weight: stay below the listed limit and account for people tugging, bumping, or replacing items in a hurry.
- Using adhesive near heat or steam: areas near kettles, ovens, dishwashers, and stovetops can be harder on removable products.
- Covering damaged surfaces: peeling paint, weak veneer, sticky residue, or soft drywall should be treated as a warning sign.
- Skipping the removal plan: if you do not know how the product comes off, do not install it in a visible spot yet.
A Simple No-Drill Kitchen Storage Checklist
Use this checklist before adding anything to a cabinet, wall, tile, or appliance side:
- Problem: the item has a clear daily storage problem, not just a tempting empty spot.
- Surface: the product is approved for that exact surface and finish.
- Weight: the loaded item is well below the product limit.
- Moisture and heat: the spot is not exposed to regular steam, grease, splashes, or heat.
- Clearance: doors, drawers, appliances, and walkways still work normally.
- Lease: the upgrade does not conflict with your rental agreement.
- Removal: you understand how to remove it slowly without pulling outward or scraping aggressively.
Pros and Cons
Useful storage without permanent holes
Freestanding, over-cabinet, and light adhesive options can improve a small kitchen without drilling into walls or cabinets.
Easy to test in small steps
You can start with one drawer insert, cart, or light hook before changing the whole kitchen layout.
Better daily routines
Putting the right item near the right task can make cooking, cleaning, and packing lunches feel less cramped.
Adhesive limits still matter
Heat, grease, texture, moisture, and overloaded hooks can make removable products fail.
Some fixes look temporary
Over-door racks and visible caddies can feel cluttered if they are overloaded or mismatched.
When to Get Extra Help
Ask your landlord, property manager, or building maintenance contact before attaching anything to a questionable surface, adding storage near plumbing, or covering a cabinet finish that already looks loose. It is also worth asking if the kitchen has older paint, veneer, or tile that the owner knows is fragile.
If a product fails, stop and document it before trying a stronger adhesive. Stronger is not always safer in a rental. Sometimes the better answer is a cart, bin, riser, or freestanding shelf that avoids the surface entirely.
Frequently Asked Questions
What should I check first for no-drill kitchen storage?
Start with the item, not the product. Decide what needs a better home, then check the surface, weight, heat, moisture, and lease limits before installing anything.
Are adhesive hooks safe for kitchen storage?
They can be useful for light, low-risk items when the product is approved for the surface and installed correctly. Avoid heavy, sharp, valuable, or breakable items.
What is the easiest no-drill storage idea for a tiny kitchen?
Start with shelf risers, drawer inserts, or a narrow rolling cart. These add capacity without asking the wall or cabinet finish to carry weight.
Can I undo these kitchen storage changes at move-out?
Many freestanding and removable options can be undone, but adhesive products still need slow removal and surface checks. Follow the product instructions and document the area before move-out.
Final Thoughts
The best no-drill kitchen storage ideas for small apartments are boring in the right way: light items, clear zones, conservative weight choices, and products that match the surface. You do not need to cover every wall to make the kitchen work better.
Start with one daily annoyance, choose the least permanent fix, and live with it for a week. If the setup stays neat, easy to reach, and easy to remove, then you can repeat the same careful process in the next tight spot.